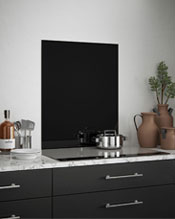
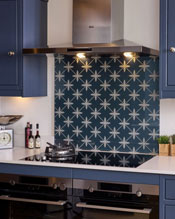
Our Coloured Glass Kitchen Splashbacks come in 2 standard sizes (width x height x depth), 600mm x 750mm x 6mm and 900mm x 750mm x 6mm.
Our Crystal Clear Kitchen Splashbacks come in 4 standard sizes (width x height x depth) 600mm x 700mm x 6mm, 600mm x 750mm x 6mm, 900mm x 700mm x 6mm and 900mm x 750mm x 6mm.
Our Fluted Clear Kitchen Splashbacks come in 1 size (width x height x depth) 600mm x 750mm x 4mm
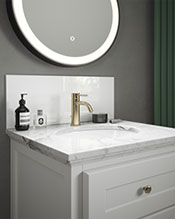
Our Glass Bathroom Splashbacks come in (width x height x depth) 600mm x 250mm x 4mm and 500mm x 250mm x 4mm sizes.
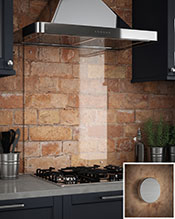
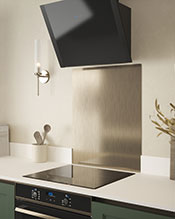
Our Metal Splashbacks come in 1 size (width x height x depth) 600mm x 750mm x 0.9mm
Before you start
1. Check that your splashback fits the space. This will depend on size of splashback ordered and your preferred orientation ie. portrait or landscape.
2. Your splashback must be at least 110mm away from the nearest heat source.
3. Check the surface is perfectly flat, non-porous, dry and dust free.
DO NOT CUT. Our splashbacks are made from high quality toughened glass or durable stainless-steel and so cannot be cut.
PLEASE NOTE. Once in place the splashback cannot be repositioned.
What do I need?
How do I install?

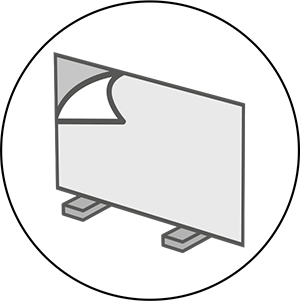
1. PEEL off backing: Make sure all corners are well protected from any hard surfaces. Carefully peel off the protective film back. Take care not to remove the self-adhesive backing.
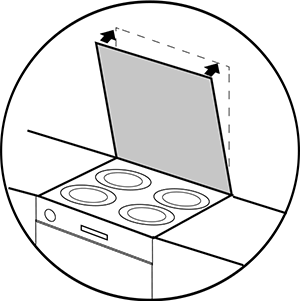
2. STICK on the wall: Place the bottom edge of the splashback to the rear of the hob, cooker, range or sink. Push it to the wall and apply firm even pressure with a cloth.
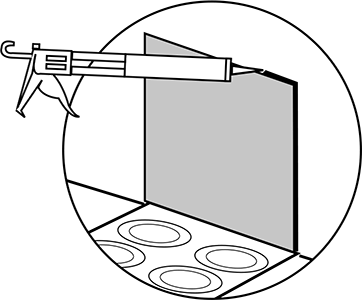
3. SEAL all edges: Use clear silicone sealant to seal around all four sides of the splashback. Take care to ensure that the sealant is no more than 2.5mm in thickness.
NB: Our Crystal Clear glass splashback does not have a self-adhesive backing. This splashback is supplied with pre-drilled holes and a fixing kit. Download our installation instructions below.
Self-Adhesive Glass Kitchen Splashback Installation Video
Download self-adhesive GLASS Kitchen Splashback installation instructions HERE
Self-Adhesive Glass Bathroom Splashback Installation Video
Download self-adhesive GLASS Bathroom Splashback installation instructions HERE
Clear Pre-Drilled Glass Kitchen Splashback Installation Video
Download Clear pre-drilled GLASS Kitchen Splashback installation instructions HERE
Clear Pre-Drilled Glass Bathroom Splashback Installation Video
Download Clear pre-drilled GLASS BATHROOM Splashback installation instructions HERE
Self-Adhesive Metal Kitchen Splashback Installation Video
DOWNLOAD SELF-ADHESIVE METAL KITCHEN SPLASHBACK INSTALLATION INSTRUCTIONS HERE
How do I look after my splashback?
Simply use hot water and a mild soap detergent to clean your glass or metal splashback. Do not use abrasive cleaners. (NB. Leave your splashback for at least 45 minutes to cool before wiping as in extreme cases applying a cold cloth to a hot surface can cause the glass to crack/shatter)
Health & Safety
Safe handling of glass: We recommend that glass splashbacks are handled with care and that eye protection and suitable gloves should be worn.
Do not touch the self-adhesive backing once the protective film has been removed as contamination can affect the self-adhesive properties of the backing. We advise that the product is brought to room temperature over a period of 24 hours if it has been subject to very hot or cold conditions beforehand.
Important: Unfitted glass is fragile. Do not place on hard surfaces prior to fitting. Special care should be taken with the corners of the product as impact will cause the glass to shatter.
Designed and made in Britain